

Tiny Gingerbread Houses
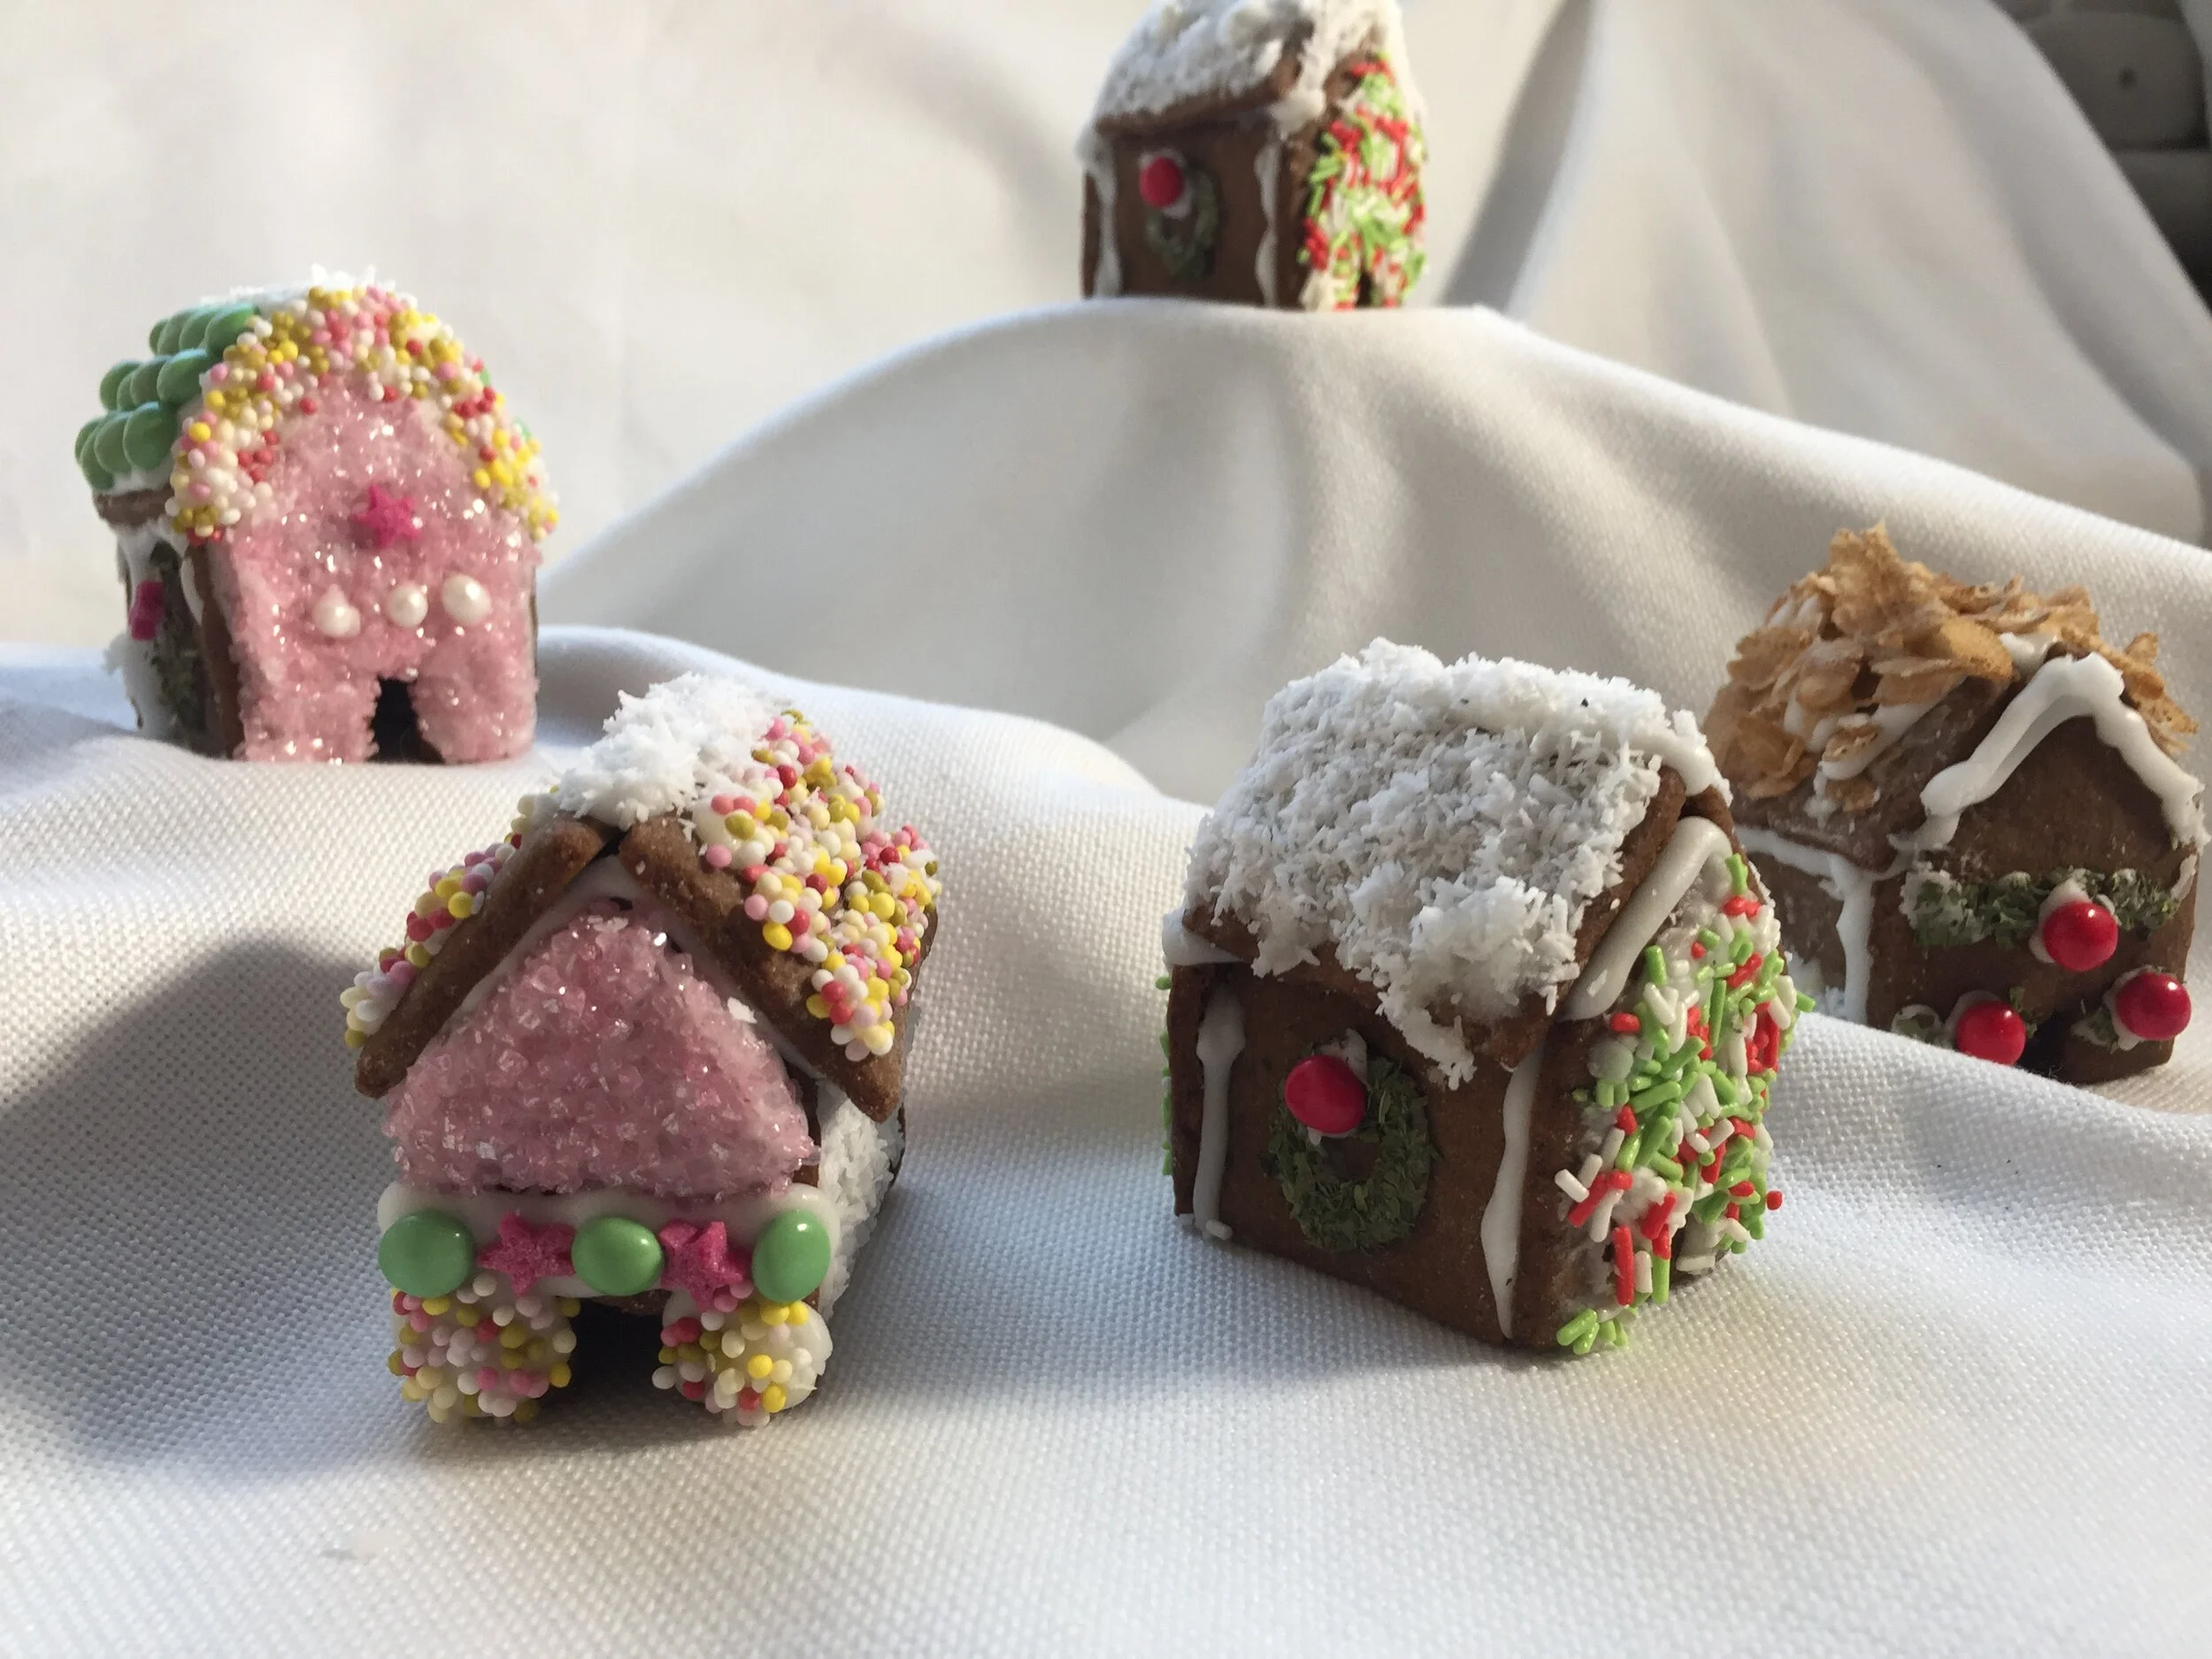
2 years ago I was inspired to build a miniature gingerbread village and it was so very much fun! I baked the dough in November and let it age and dry out over a few weeks, before I attempted building with homemade royal icing. They turned out absolutely adorable and many were gifted inside glass jars with a bit of shredded coconut for ‘snow.’ I simply hand-cut a pattern from cardstock and covered in packing tape for repeated use. I know you can find some cookie cutters to do the same and save yourself the trouble, but the creation of the concept to completion was half the fun. The trick to good gingerbread building ‘walls’ and ‘roofs’ is to avoid and chemical leavening (baking powder, baking soda) in the dough. Also, since you’ll likely not be eating these, shortening is best instead of butter. Let these age at least a few days in open air (cooling rack is perfect) before attempting to build.
3/4 cup shortening
1 cup packed brown sugar
1 large egg, room temperature
3/4 cup molasses
4 cups all-purpose flour
2 teaspoons ground ginger
4 teaspoons ground cinnamon
1 teaspoon ground cloves
1/4 teaspoon salt
Method:
Design you pattern: roof (to cut 2 per/house), front/back (to cut 2/house) & side (to cut 2/house).
Mix your dough in a food processor or stand mixer. Refrigerate dough 30 minutes.
Preheat oven 350F/180C.
On parchment paper, roll out the dough 1/16” thick (or you may prefer thicker walls 1/8” thick). You may need a very light dusting of flour on the parchment to keep the dough from sticking.
Place your pattern on top of the dough and cut out the pattern pieces. You may wish to to an entire tray of rooftops. Then repeat with front/back & sides.
Pull away the excess dough around each cut out. Keep this dough to re-roll. Place the parchment paper with cutouts onto the baking tray and bake until golden, but not burnt, approximately 5-8 minutes. Since the pieces are very small and will cook faster than full-sized cookies, you’ll need to keep an eye on them.
Immediately out of the oven take a paring knife and trim any uneven edges to straighten them. This must be done very carefully to avoid burning yourself, but as soon as the cookies cool, you won’t be able to trim without breaking them.
Cool on a wire rack several days to weeks. Decorate as you wish with homemade royal icing and candies. Breakfast cereals, cake sprinkles and cookie glitter make perfect decorated houses as they are too small to hold most candies used on larger gingerbread houses. *You may want to use tweezers to place the candies on. Also, consider building 2 walls at a time and allowing to dry, while you take a break and repeat. Don’t expect all 6 pieces to be held together without collapsing if you glue all sides at the same time. The sides need time to dry. Consider gluing: 1 front/back + 1 side (allow to dry). Repeat with other 1 front/back + 1 side (allow to dry). Glue all 4 sides together, allow to dry. Lastly, glue 1 side of the roof & let dry and repeat with last roof piece. Then you can decorate. Best to do this over several days or in 1 day, but with many drying breaks as you do other things at home. Cement completed houses with royal icing into glass jars if you like. They keep in glass jars for several years.